Connect ToolDurus to ChatGPT via MCP
Connect your ToolDurus tools directly to ChatGPT using a custom MCP server. Follow this illustrated guide to configure your MCP connection, confirm access and try your first workflow.
You need a ToolDurus account, access to your personal MCP server URL and a ChatGPT account with custom MCP server support. The exact interface may differ depending on your ChatGPT plan and version.
1. Open ChatGPT Plugins
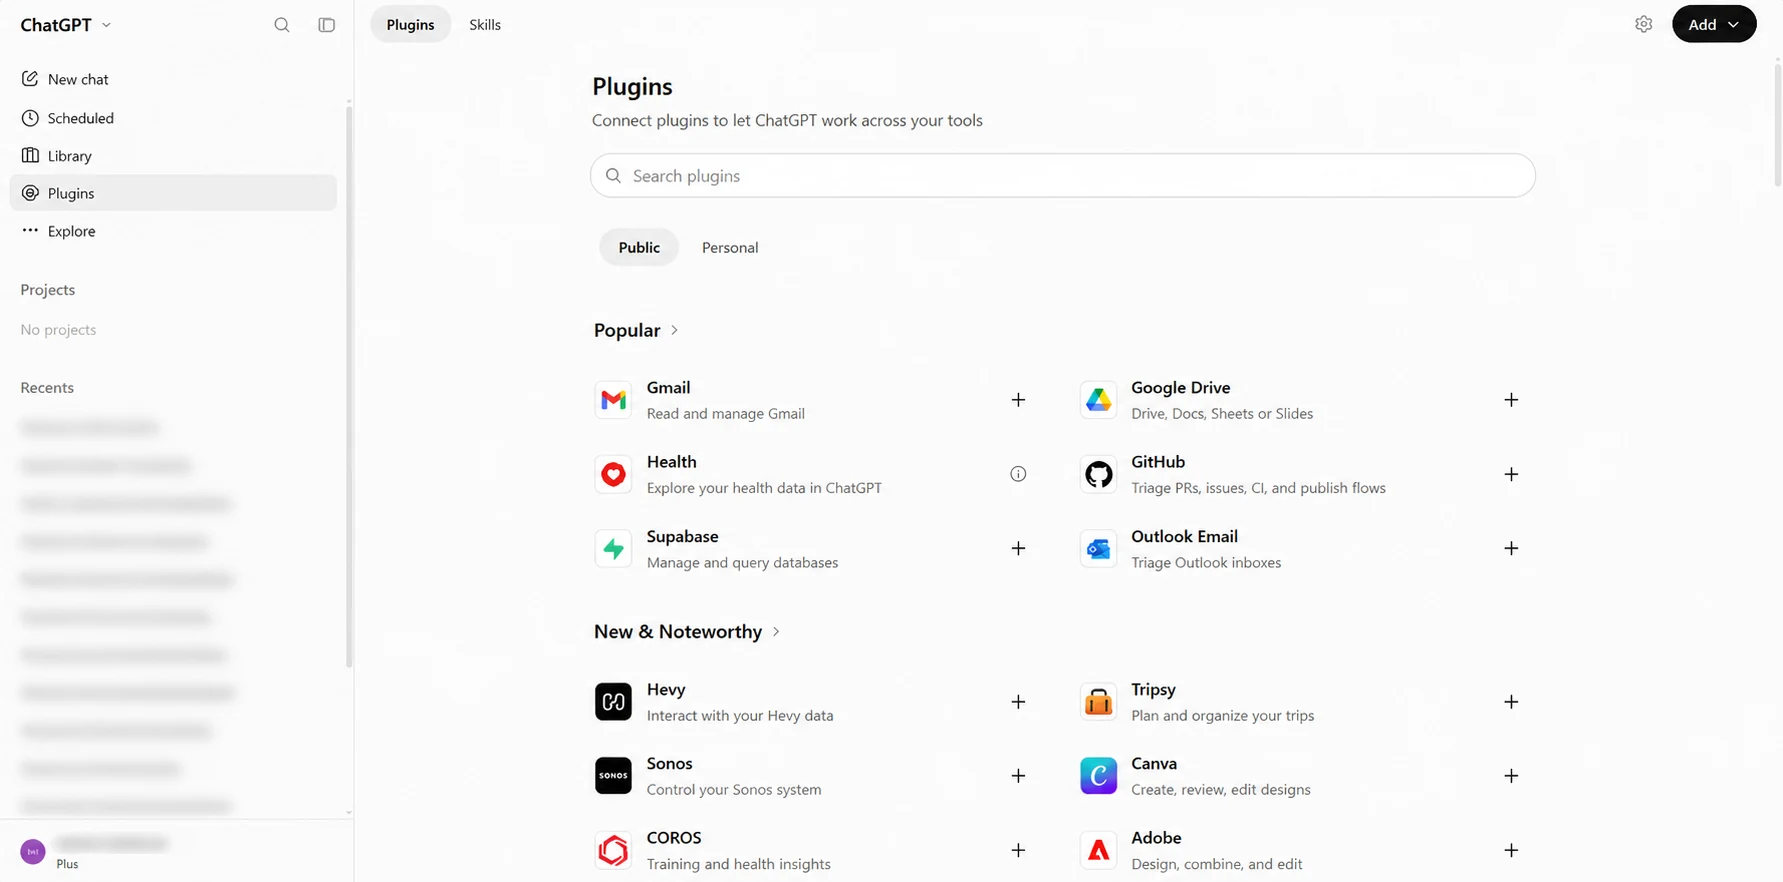
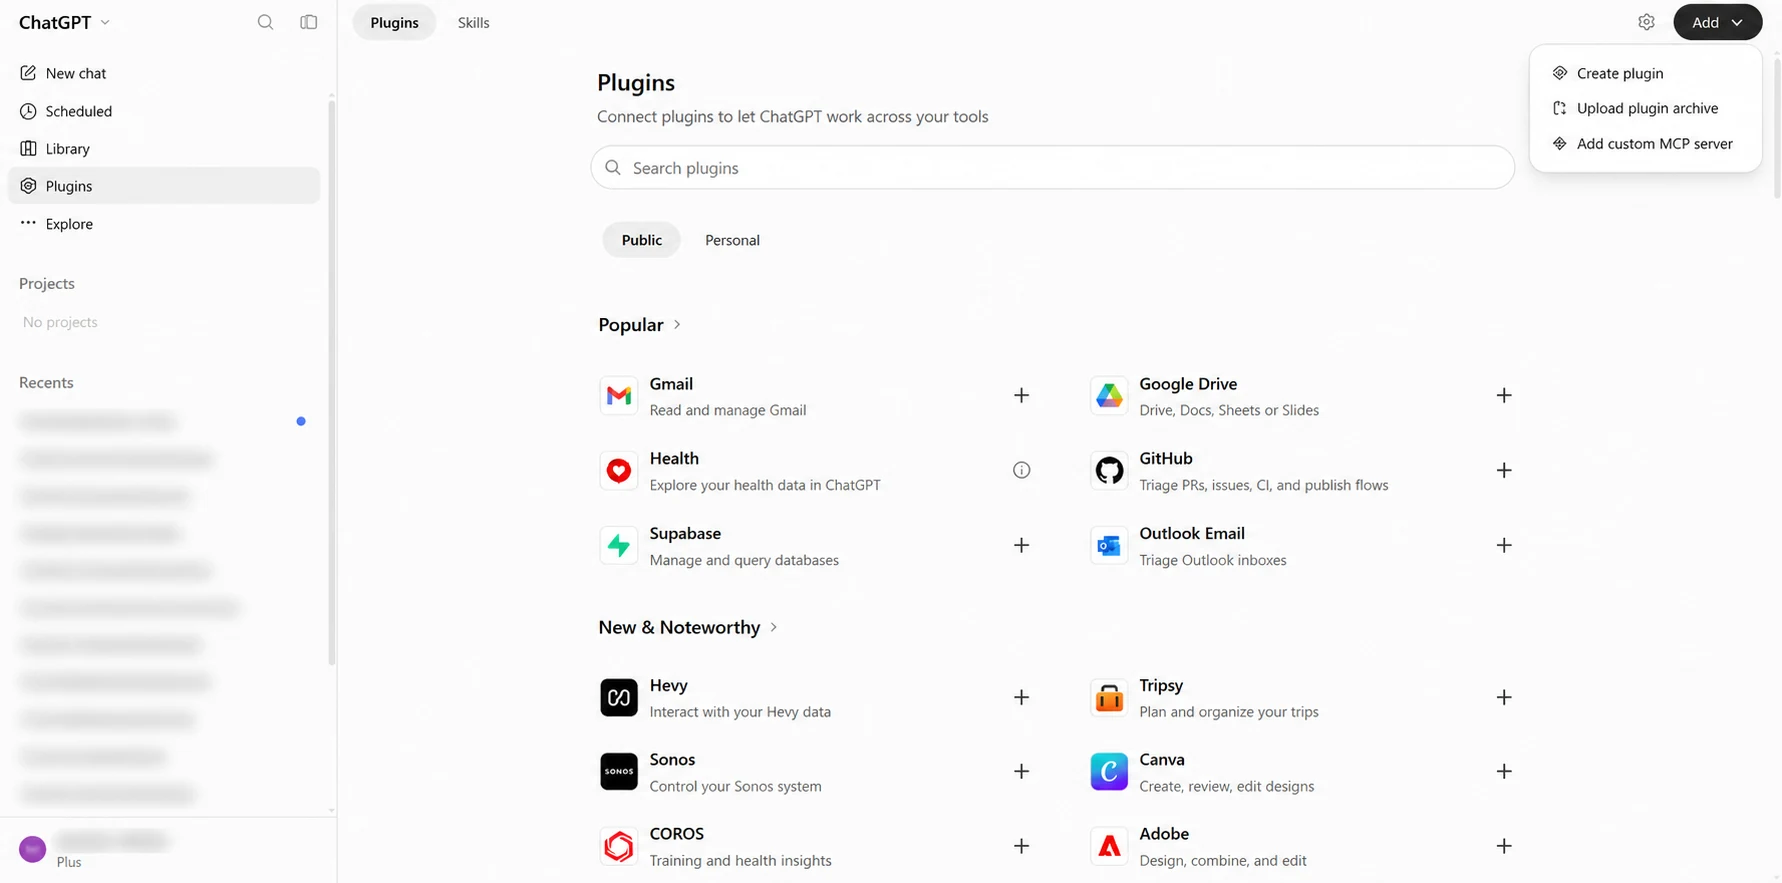
In ChatGPT, open Plugins from the sidebar. Click Add in the upper-right corner and choose Add custom MCP server.
2. Configure the MCP server
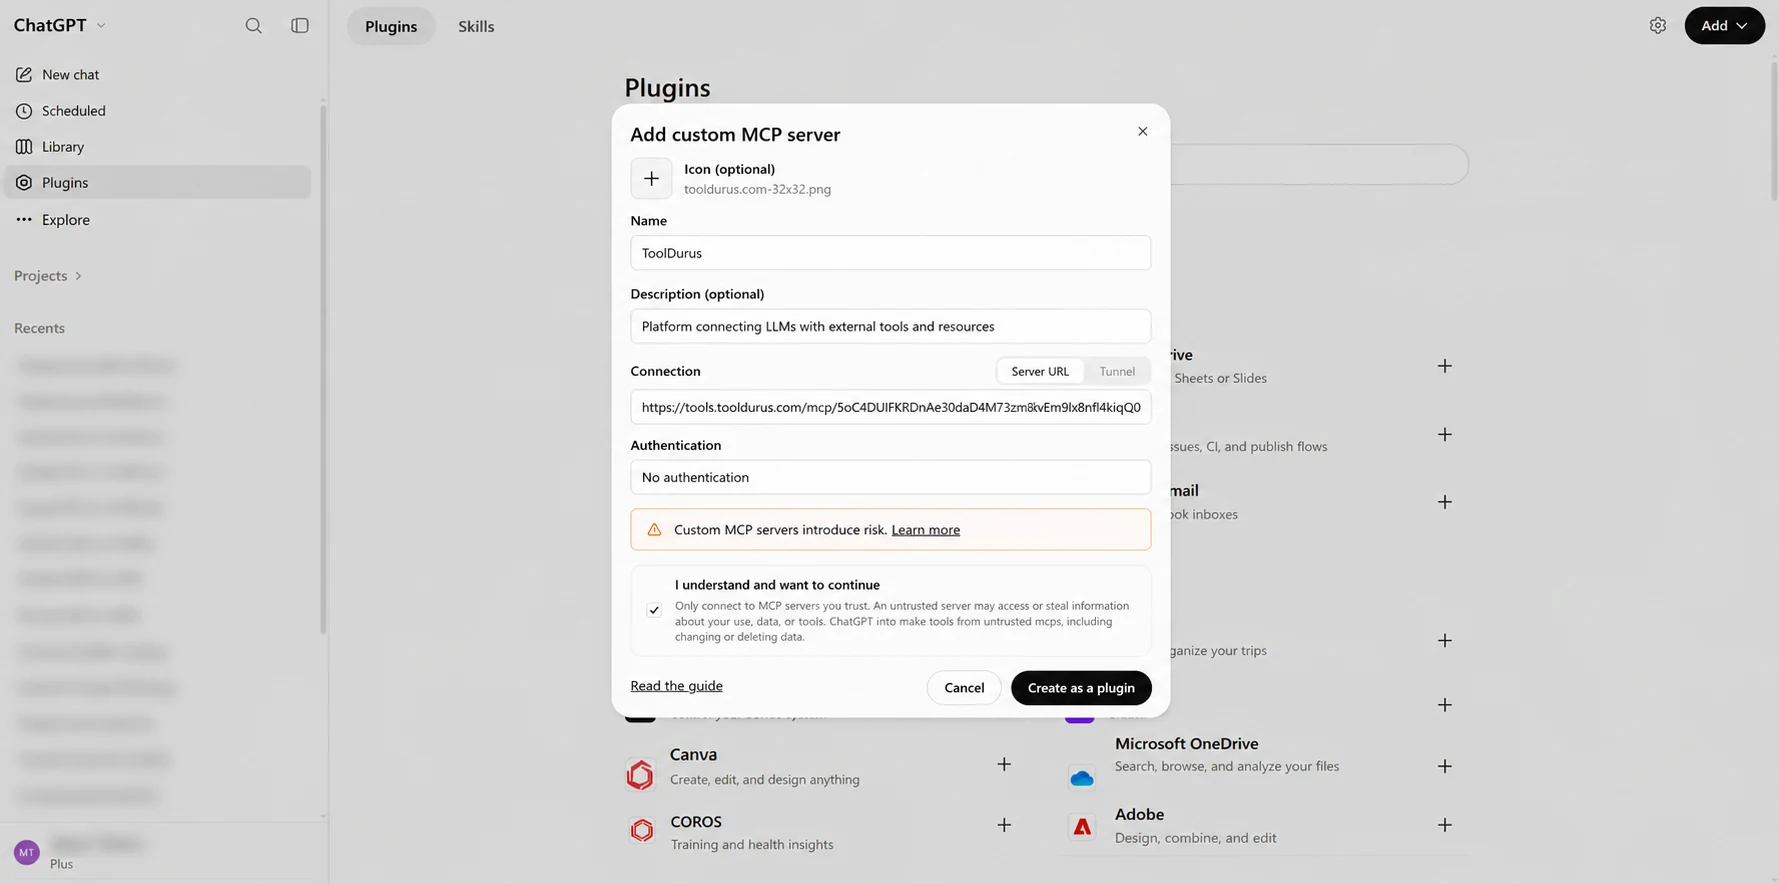
Fill in the server details. Use your own ToolDurus MCP endpoint, not an endpoint copied from a screenshot or another user.
- Name:
ToolDurus - Description:
Platform connecting LLMs with external tools and resources - Connection: Server URL — paste your personal ToolDurus MCP URL
- Authentication:
No authentication
Select No authentication as shown, review the custom MCP server risk warning, tick I understand and want to continue, then click Create as a plugin. Use only your own trusted ToolDurus MCP URL.
Your personal ToolDurus MCP URL may contain an access token. Treat the entire URL like a password: never share it with anyone, publish it in screenshots, paste it into public chats, or commit it to a repository. Use only your own URL. If it has been exposed, revoke or rotate the token in ToolDurus before using it again. Selecting ‘No authentication’ in ChatGPT does not make the token in the URL public or safe to share.
3. Confirm the ToolDurus connection
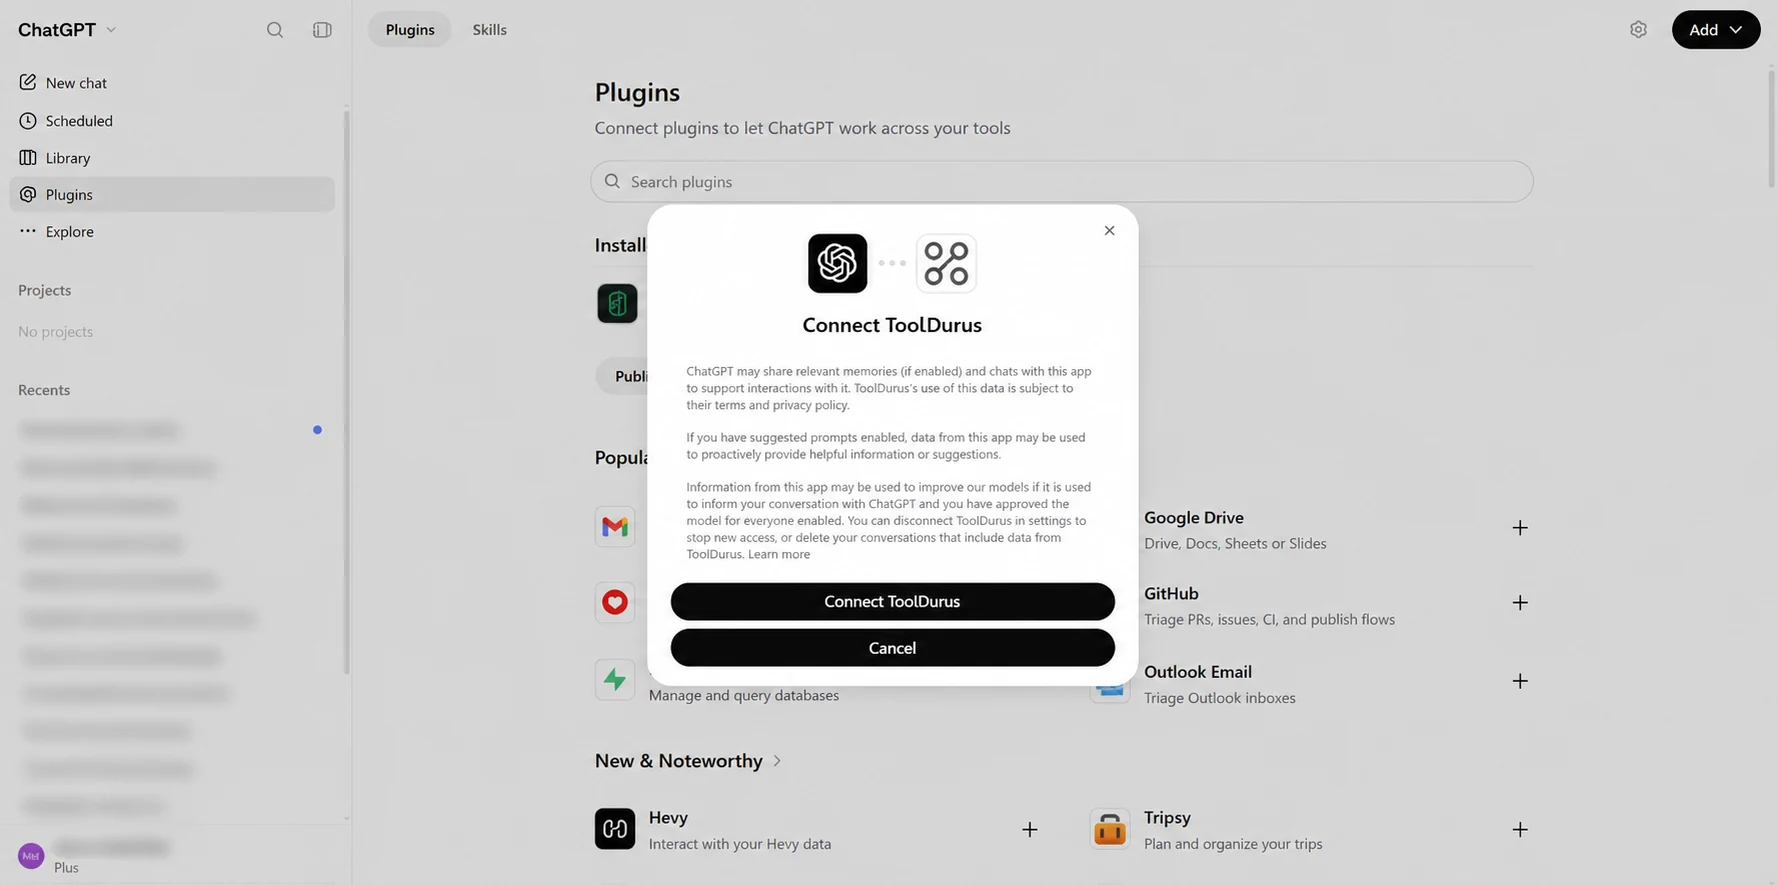
ChatGPT may show a connection confirmation. Review the data-sharing notice and click Connect ToolDurus to proceed. The server configuration shown above uses No authentication, not OAuth. Only connect servers you trust.
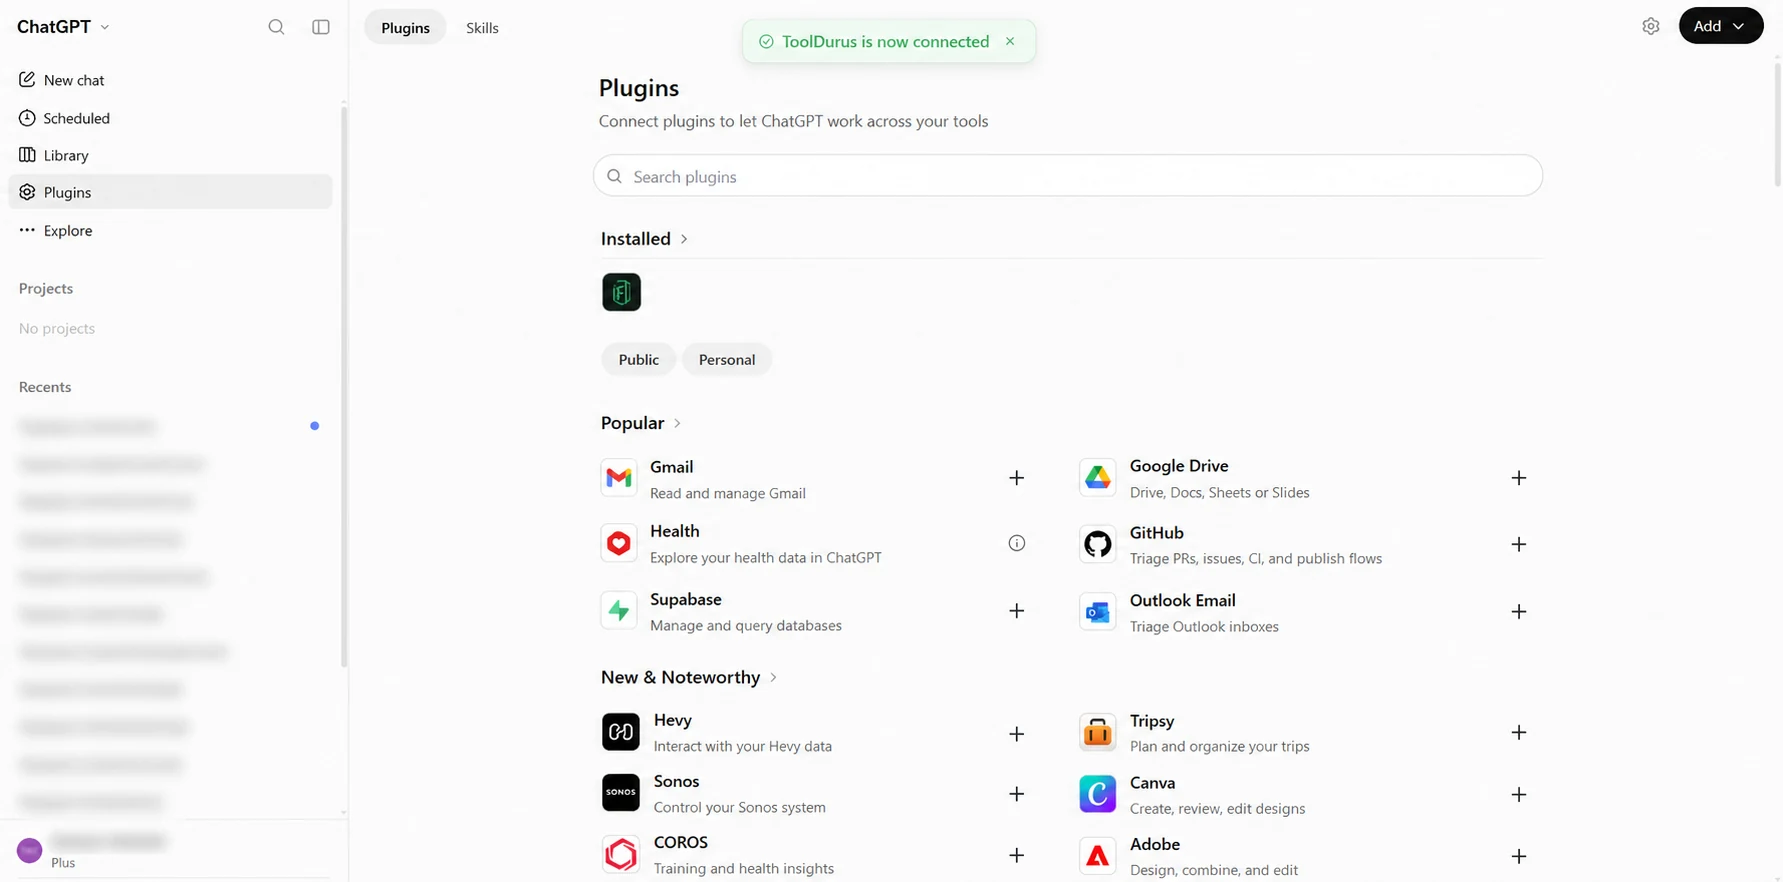
4. Check that the plugin is connected
Once the connection succeeds, ChatGPT shows a confirmation and ToolDurus appears under Installed. You can now use its available tools from the chat.
5. Try a real workflow: PDF/A validation
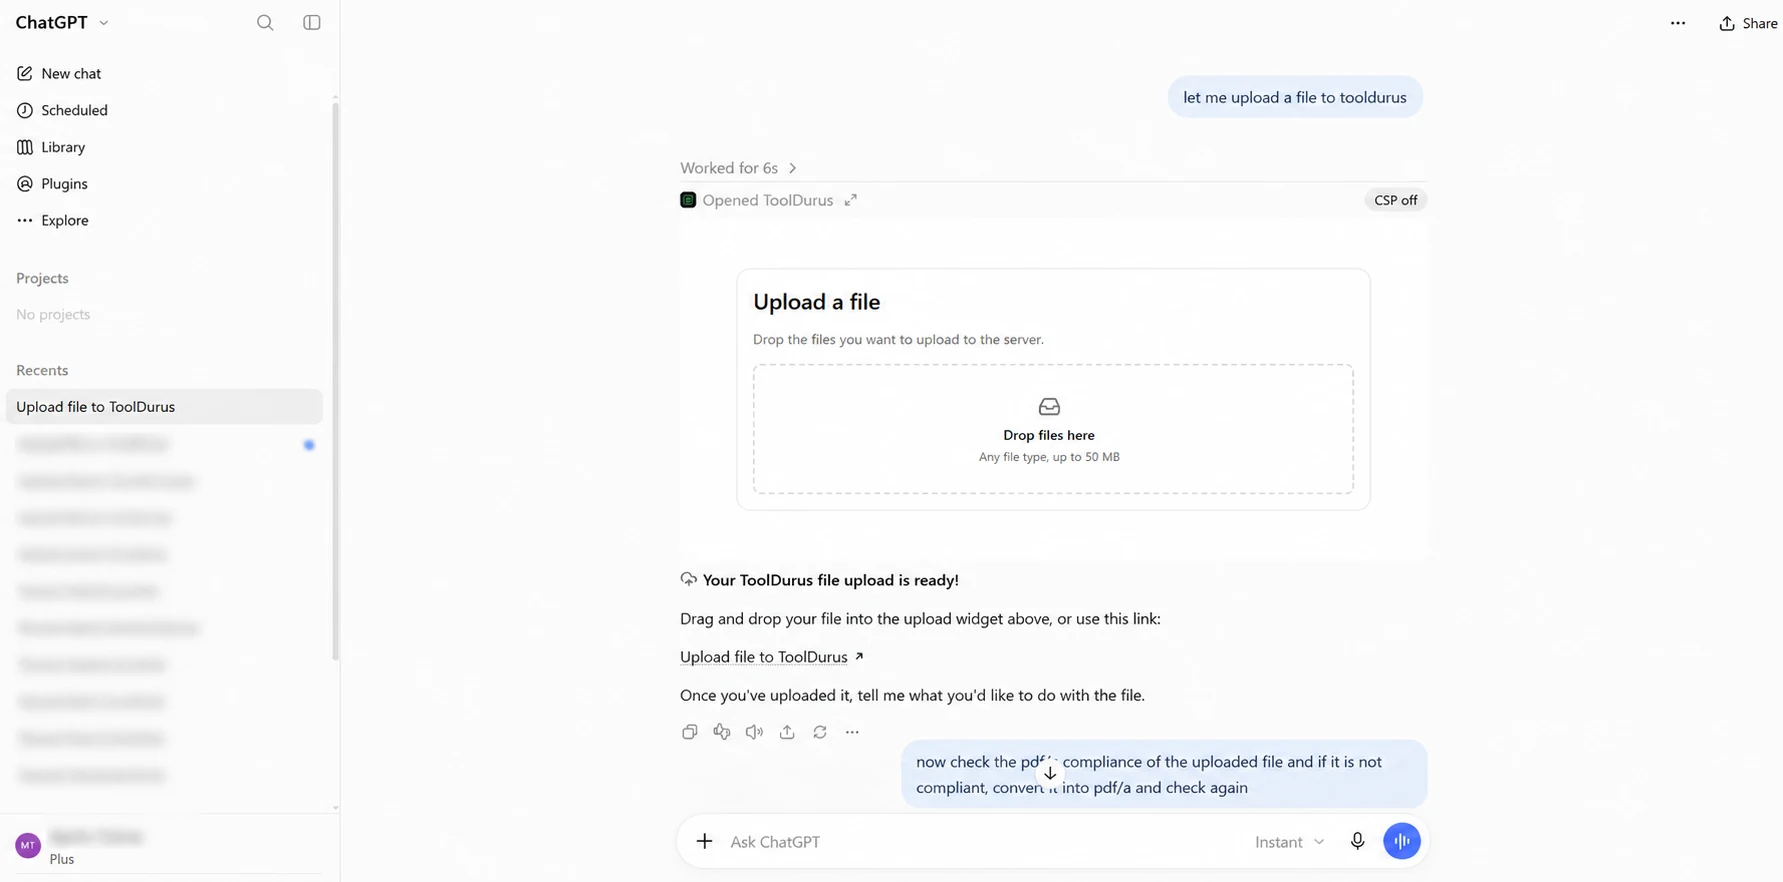
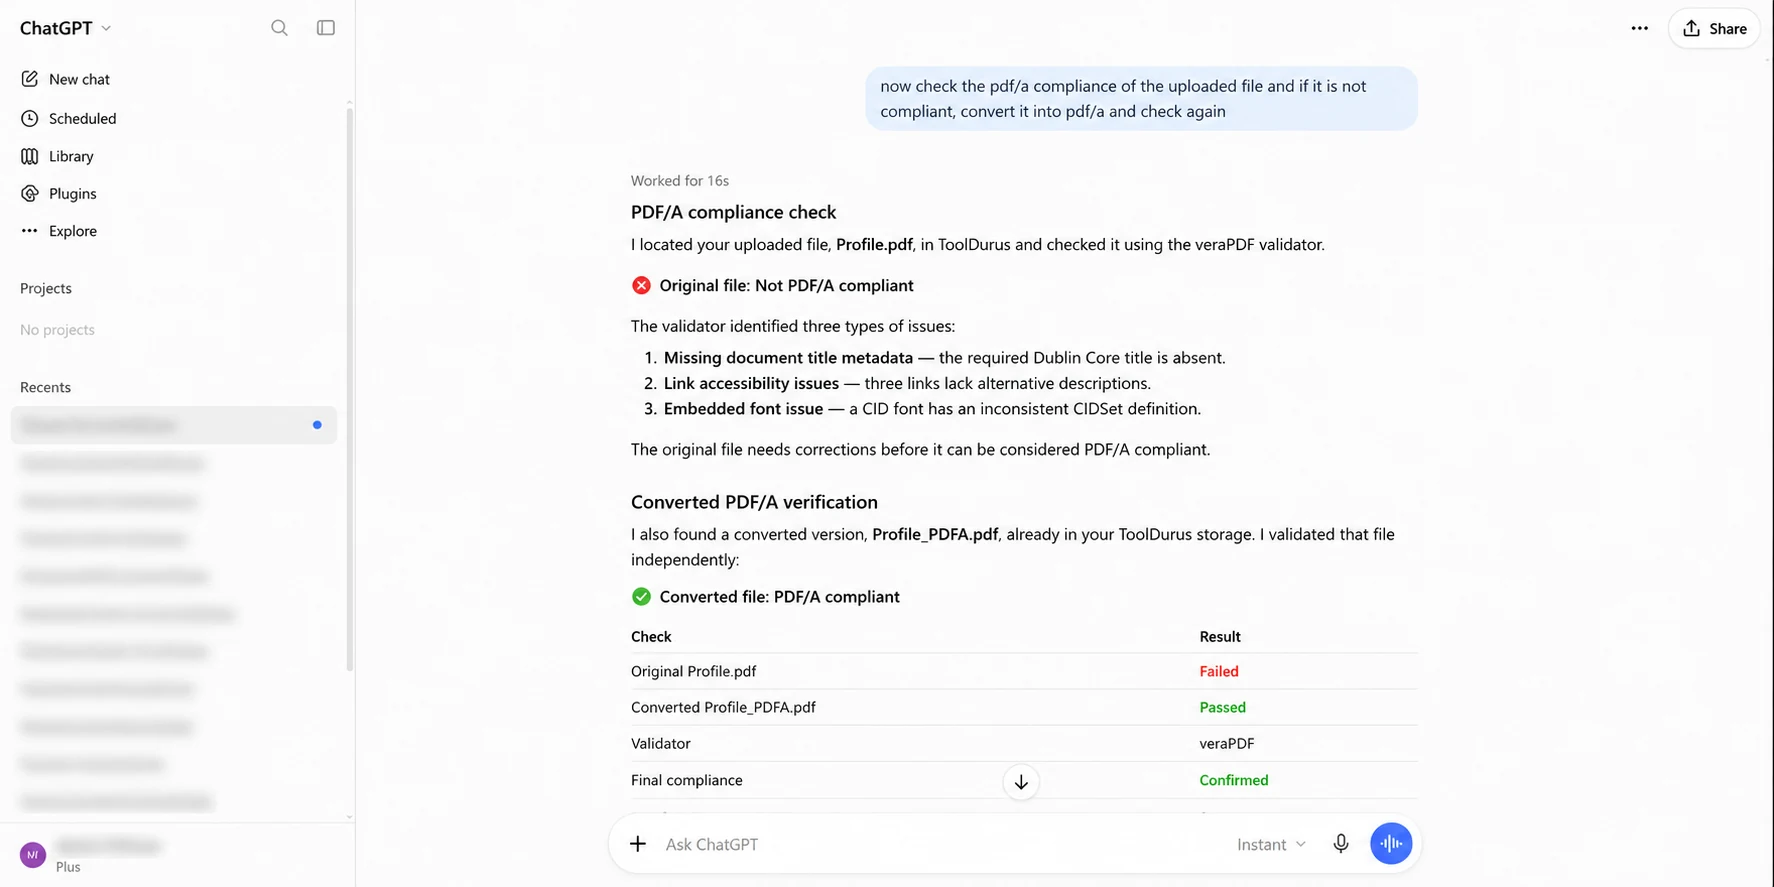
For example, ask ChatGPT to open ToolDurus and provide a file-upload interface. Upload a PDF, then request a PDF/A compliance check, conversion if needed and a second validation.
Check the PDF/A compliance of my uploaded file. If it fails, convert it to PDF/A and validate the converted file again.
6. Retrieve the output file
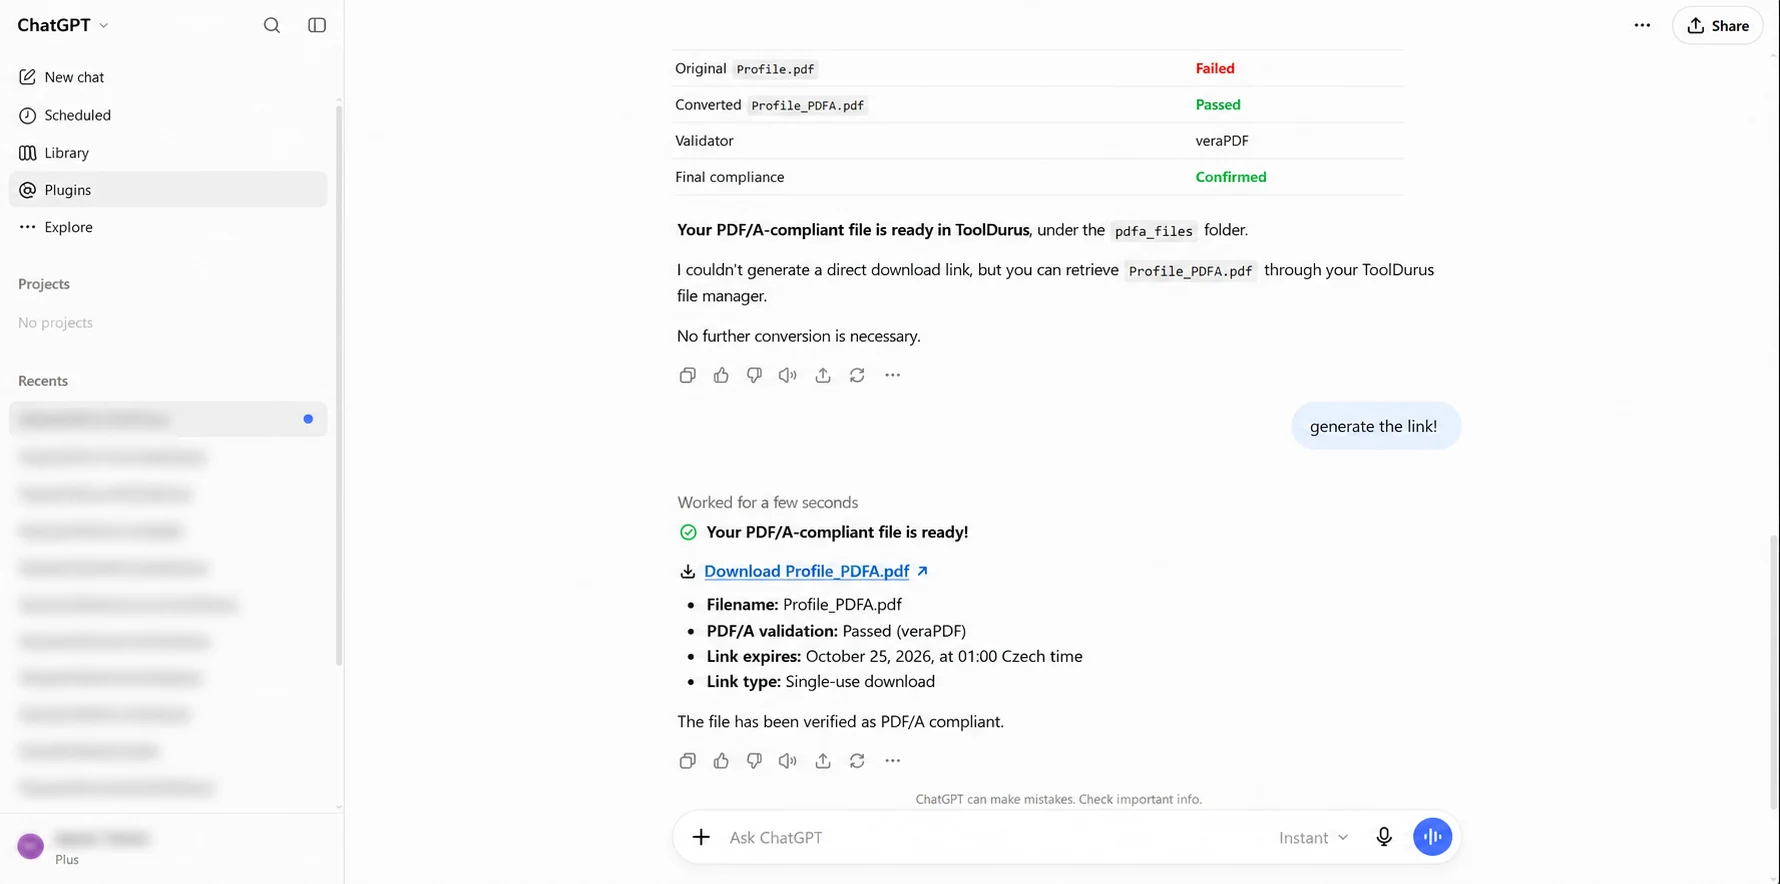
Ask ChatGPT to generate a download link for the converted file. If the integration supports it, ToolDurus can provide a temporary download URL. Check the expiry time and whether the link is single-use.
Ready to connect your tools?
Open ToolDurus →